PRO External Forms
Analog of anonymous tables designed using material-ui.
Integrated into any page by inserting js-code.
Quick Forms

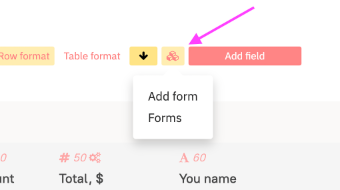
Based on any simple table you can create a quick form. This is a simplified form mode that allows unauthorized users to add rows to the table.
During creation, you need to select the user from whom the form will operate. This user must have a role that can add rows to the target table.
After creating the form, you will see a link to it and the embed code (if you need to integrate the form into another site's page).
When creating, the form is assigned a unique name for the schema, and several different forms can be created for one table.
The availability for editing and visibility of fields in the quick form depends on the role of the user accessing the form, as well as the function setFormat field formatting code.
If you need to dynamically hide a field in the form, the table formatting code in the form is not applied — instead, you need to use the parameter hide: "form" = true of the function setFormat.
The form is a row in the table System Tables — Main — Forms — Forms TTM. To edit the form after its creation, you need to edit this row.
General Form Settings
If you click on Configure Form, you will get access to the general form settings and field settings.
Form Title — the title on the form page.
Table Text — arbitrary text between the title and the form.
Sections — not used in quick forms (one section quickMain is automatically created, do not delete it or change its settings)
Main Section Title for Quick Form — Section parameters applied to fields in the form in JSON format. By default, it is:
{ "fill": true, "maxwidth": "600", "nextline": true }
HTML on Save — this is the text that will be shown to the user upon successful saving of the row to the table.
Totum Code on Save — this is the code that will be executed after successfully adding a row to the table. The variable
$#rowIdreceives theidof the added row. As a result of this code, you can use:- linkToDataText — a pop-up window with text.
- linkToDataHtml — a pop-up window with text formatted in HTML.
- linkToScript — redirection to another page.
Maximum Form Width on Main Host — the width of the form when opened via the link. If you embed the form on another site, the width is determined by the width of the parent
div.Title for Browser — arbitrary browser title when opening the form via the link.
Background File URL — path to the background image file when opening the form via the link.
Form Available Only with Parameters — if you use the function linkToQuickForm to pass preset parameters to the form, checking this box blocks access to the form without parameters. Access will only be via a link formed by the function linkToQuickForm.
Form Field Settings
Key fields:
View type — you can set a display type for the field different from the base one.
View data — in this field, display parameters for
View typeare set in JSON format. To fill in by template, right-click and selectDefault.Field title — overrides the field title. To disable the title, enter
*NONE*.
The technical field __save is responsible for the save button in the form. In the Code format field, the formatting code determining the button color by default is set — it can be overridden by setting an arbitrary color.
Passing Parameters to Quick Form
Using the function linkToQuickForm, you can form an encrypted link containing the values of the fields specified in it.
For the values to be applied, these fields must have access to change when adding for the role of the user from whom the form is launched.
If you use the fixed parameters, these fields will be locked for the form user.
Passing Parameters to a Hidden Field in the Form from JS
A Data type field is added and assigned a viewtype — JS.
It must be accessible for the role from which the form is called, otherwise, it will not appear in the DOM. For the user, it is visually hidden.
In the id parameter, set your id by which you can refer to this field in the DOM.

To pass data to it, you need:
<script>
        let interv = setInterval(()=>{
            let element =  document.getElementById('your_id_for_field');
            if(element && element.setTotumValue){
                clearInterval(interv)
                element.setTotumValue(JSON.stringify(
                    ["your_data"]));
            }
        }, 100);
    </script>